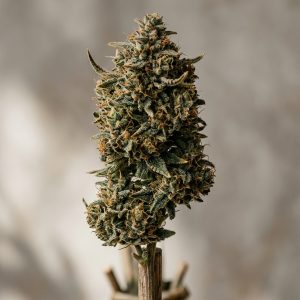
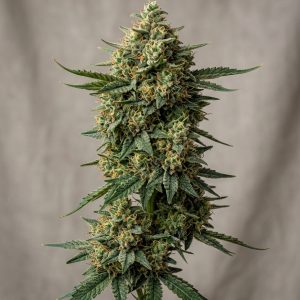
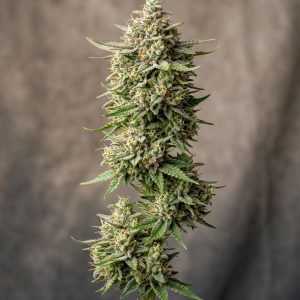

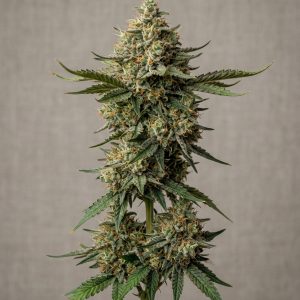
Growing marijuana in soil has numerous benefits. Undoubtedly, this is the most natural method for cannabis cultivation.
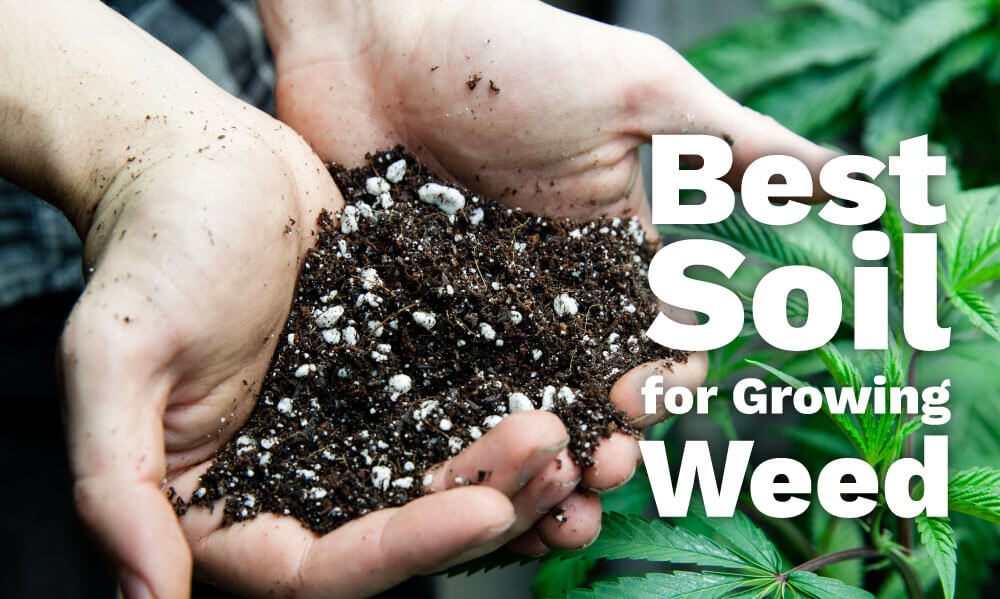
Once you learn how to utilize the best soil for growing weed, you can enjoy succulent, juicy buds full of flavor that feature top-shelf quality.
Moreover, the soil is the most forgiving growing medium. This means that you can easily fix any possible issues that may occur during your marijuana growing journey and still end up with sufficient yields. Hooray!
Last but not least, soil growing allows you to nurture your cannabis plants 100% organically or you can also choose to take advantage of non-organic fertilizers to boost yields.
However, it is a MUST to understand that picking the best soil for growing weed doesn’t come with some magical, fit-them-all solutions. Meanwhile, the difference between using the right type of soil vs. using the wrong type can be summed up as a bountiful harvest or a disappointing failure.
So what type of soil to opt for if you’re planning to grow outdoors? Or what about those who are planning to grow indoors? Maybe you are considering a balcony growing operation? There are many possible scenarios, and we’re here to guide you through all the essential bits of information you need to master the best soil for weed growing.
Marijuana Soil Growing: The Basics
Before delving any further into discussing the practical side of choosing or mixing your own top-quality soil for growing cannabis, we first need to take into account the basics of marijuana soil growing.
There are several factors that are closely and intricately related to picking and maintaining the best soil for growing weed.
1. pH balance
2. Drainage
3. Water retention
In a nutshell, good soil for weed growing no matter if you plan on growing weed outdoors or indoors will possess a good balance between the pH levels needed for cannabis plants to thrive, proper drainage, and water retention rates.
The right ratio of drainage and water retention rates helps your marijuana plants develop a healthy, strong root system.
Correct drainage is crucial for preventing issues related to root rot, for example. It is also crucial because of the fact cannabis plants can’t possibly utilize the right level of oxygen flowing through their roots if the soil is clumped up and rather heavy.
Meanwhile, the best cannabis soil will also be capable of holding on the right amount of water so that your plants won’t end up under-watered.
Water helps for the transportation of essential elements from the soil and through the roots all the way up to the hungry buds, as well as the leaves, and the stems. So if the drainage of your soil is too high, your plants may fail up to feed well, and this can result in stunted growth and/or nutrient-related issues, resulting in decreased yields and unhealthy plants.
But even if you do choose or mix up soil that possesses a perfect ratio of drainage to water retention rates, this won’t help you in growing vigorous, high-yielding cannabis plants if you don’t pay attention to keeping the accurate pH balance of the soil.
How to Choose Cannabis Soil Featuring the Correct pH – Drainage – Water Retention Balance?
Most importantly, don’t get overwhelmed by these particular specifications. All potting soil mixtures available in the stores provide reliable information regarding the pH-drainage-water retention rates.
Also, you can always ask the experts at your local garden store for some friendly guidelines on that matter. If you’re shy about mentioning cannabis, just seek for information regarding tomatoes growing. Tomatoes and marijuana plants thrive in quite similar conditions, especially when it comes to soil.
Once you choose soil that has excellent drainage-water retention rates for growing cannabis plants, adjusting the pH levels whenever needed can feel like a breeze. Both measuring and maintaining the pH balance is an easy-peasy task once you get equipped with a pH tester.
pH meters are affordable, easy to purchase both online and offline, and they are effortless to use. Undoubtedly, you can’t simply stick your finger into the soil and measure the pH levels. But a pH meter will do this job for you quickly and accurately. It costs only about 10 bucks while the benefits you will reap are worth at least 100 bucks in return (really, at least!)
As a rule of thumb, the best soil for growing weed will feature pH levels of 5.8 and up to 6.3.
In fact, the lucky pH number for marijuana growing is 6.0. This is the golden middle, the golden rule if you wish to call it that way.
Why Picking and Maintaining the Best Cannabis Soil is Strain-Specific
When looking at a pH scale, you can notice that it goes from 0 to 14. pH levels from 0- 6 fall into the acidic side of the pH scale; 7 is neutral; 8- 14 fall into the alkali side of the pH scale. Most cannabis plants will thrive best when introduced to pH levels of 6 as they prefer very slightly acidic soil.
Adjusting the pH levels is not as complicated as it may seem. If the pH levels are higher than needed, you can use a mixture of coffee and water or a mixture of water and freshly squeezed lemon juice to balance these out (pH levels of coffee on the pH scale are estimated at 5, while lemon juice is estimated at 2 on the pH scale). Using a mixture of baking soda and water can help to adjust low pH levels as baking soda ranks at 9.5 on the pH scale.
But still, there might be some exceptions on that note. With this in mind, we want to highlight that the best soil for cannabis cultivation is actually strain-specific. Some cannabis strains can perform fantastically in soil that features a pH of about 7, for instance. That’s why choosing the right strain is such a crucial part of your growing operation, and it is also related to choosing the right type of soil.
To be more specific, it can take years to create the best soil for growing a particular strain in order to end up with those Big Buds-magazine-like frosty nuggets. But that’s exactly why we love growing cannabis so much! Rather than strict science, cannabis growing in soil is a form of art.
Discussing the factors that separate poor-quality soil for cannabis growing from top-quality soil for cannabis growing, we must also point out to the essential micronutrients and macronutrients that are no less important than optimizing the drainage-water-retention-pH balance of the soil.
The Best Soil for Marijuana Cultivation: Micronutrients, Macronutrients, Fungi and Good Bacteria
The macronutrients obtained from soil include Nitrogen (N), Phosphorus (P), and Potassium (K), always labeled within the following order N-P-K. These particular elements are needed in larger dosages than the much more scarcely-used micronutrients.
The micronutrients your cannabis plants obtain from the soil in very low dosages include Iron, Calcium, Boron, Copper, Sulphur, Zinc, Manganese, and Molybdenum.
There are several ways of maintaining the perfect balance of essential micronutrients and macronutrients.
Cannabis Super Soil: The Basics
Firstly, you can purchase or make your own cannabis super soil. Super soil for cannabis growing refers to a soil that doesn’t require any additional fertilization as all the vital micro- and macro-nutrients are already present and gradually released through the beneficial action of the living microorganisms in the soil.
The miraculous living microorganisms found in soil are called mycorrhizae. Mycorrhizae is a type of fungus which literally translates into “fungus root” in Greek.
Mycorrhizae establish their colonies in soil little by little, that’s why preparing your own cannabis super soil is not a quick win. Instead, it takes about 2 months (60 days) before the incredible mycorrhizae turn good-quality soil into a truly living soil of highest quality.
Mycorrhizal fungi are available at many garden stores but you can also find them on Amazon, averaging from $10 to about $40.
Apart from the beneficial action of Mycorrhizae, organic acids found in soil are cannabis plants’ best friends. Humic and Fulvic acids are both organic acids that can be found on the labels of super soil.
Humic and Fulvic acids greatly improve soil’s fertility, and they work in symbiosis with Mycorrhizal fungi. Humic acids amendments are also available both online and offline and typically cost about $20 – $30.
The beneficial interaction between the colonies of fungus and good bacteria in cannabis super soil only gets better as time passes by. This means once you establish these colonies, you can get to a whole new level of cannabis cultivation in the soil. Commonly referred to as no-till cannabis growing, you can use the same soil over and over again, and it will only become better and better suited to cater to your plants’ needs.
Cannabis super soil is also naturally pH-balanced. However, measuring the pH levels is still highly recommendable to prevent any possible issues from hitting your garden.
On the downside, purchasing a good batch of readily-available super soil can be quite costly, as 1 pound of organic super soil is about $15 and it can help you fill only a single 5 gallon bucket since you’ll also need to add 1/3 of light potting soil to the mixture.
On the other hand, not all of us are willing to spend a lot of time for creating super soil from scratch. Sometimes, it might be the case that your time is limited, so you may want to leave you super soil amending journey for your next crop. If you’re stuck in any of these possible scenarios, there are other suitable alternatives when it comes picking the best soil for growing weed.
Marijuana Seeds’ Secret Recipe for Homemade Organic Cannabis Super Soil& Organic Fertilizer
Start by marking a three by three square on the ground and coating it up with a 4-inch layer of dry leaves and/or straws. Dry leaves and/or straws serve as carbon material which is essential for the well-being of your cannabis plants.
Proceed by adding a 4-inch layer of coffee grounds or animal manure. Next, add just ½-inch of Blood meal (mind that Bone meal can work great, too). All that’s left to do now is to repeat the layering process step-by-step until your pile reaches 3 feet high. From now on, you will have to manually turn the pile over each week (or every three days or so) until it is fully decomposed.
You can make sure that you have fully accomplished the composting process when the soil feels fluffy, soft, and crumbly in your hands. It will become dark black and start emitting a sweet reminiscent rather than any smell that is hard to tolerate. Do keep in mind that this organic soil will need to be mixed with a suitable, light potting mix typically, you want to go for 1/3 and up to ½ of this organic soil mixture and ½ or up to 2/3 of light potting soil.
But apart from creating your premium cannabis super soil by mixing the matured organic soil with a light potting mix, you can create your very own organic fertilizer!
For this purpose, spread a plastic sheet on the ground so that you can mix all the ingredients well without letting any slip away.
Cover the plastic sheet with a 1-inch layer of the organic soil. Add a scoop of mycorrhizae and a scoop of Coco fiber. Next, add 1/8 cup of Epsom Salt, ¼ cup of Azomite, ½ cup of Sweet Dolomite Lime, 0.75 kg of Rock Phosphate, 1 tablespoon of Humic acid (in this case, opt for powdered Humic acid as liquid ones might be too strong to proportionate this soil recipe in the best way).
Now, add another 1-inch layer of your organic soil. Proceed with spreading 1 kg of Bat Guano. Cover the Bat Guano with another 1-inch layer of organic soil. Afterward, add 1 kg of Blood meal and cover it with a 1-inch layer of your organic soil. At this point, it’s time to spread 1 kg of the Bone meal (but do make sure you steam it carefully before adding it to the super soil mix). Proceed with layering another 1-inch of organic soil over the steamed Bone meal. Using a shovel, mix everything very well.
Finally, fill suitable containers with the soil mixture up to ¾ of their total volume. Add water until the mixture becomes smooth and uniform – you don’t want to let it get too runny or too dense – aim for a similar texture to that of a cream soup. The last step of the process is to leave your 100% organic fertilizer to steep in the sun for a full month.
No Super Soil? No Problem.
Even if you don’t opt for super soil for growing cannabis, you can still make your green ladies flourish. You can supplement the essential elements your cannabis plants need through different methods of additional fertilization, such as brewing your own compost tea, applying all-natural fertilizer mixtures, or top dressing your cannabis plants.
Nevertheless, you can opt for readily-available fertilizers whether these are composed of organic or non-organic elements.
As a rule of thumb, the best soil for growing weed is highly dependable on the stage of your plants’ lifespan.
Also, the best soil for growing photoperiod cannabis varieties will not be the most suitable choice for growing autoflowering cannabis varieties.
Last but not least, adjusting the soil to make it well-working for outdoor cannabis growing operations will differ from indoor cannabis growing operations. Let’s get down to discussing these differences and the best practices on that matter below.
Best Soil for Growing Weed Indoors
You can’t simply pack a bag of soil from your backyard, bring it indoors, and start growing – this is not what you want to do! Instead, you want to choose a potting mix that will provide the correct drainage-water-retention rates we discussed above, and will also feature suitable pH levels.
When searching for a good-quality potting mix, the most important ingredients you want to look for are neatly listed in the following classification.
1. Perlite
2. Vermiculite
3. Coco Coir
4. Peat moss
Perlite increases drainage. Coco Coir increases aeration. Vermiculite increases water and nutrient retention rates while it also boosts aeration. Peat moss releases moisture to the roots only gradually, as needed. Ideally, peat moss should make up about 1/3 and up to 2/3 of the total amount of a cannabis potting mix’ composition.
Keep in mind that peat moss is acidic, and it is not recommended to be present in the soil of your seedlings. Seedlings prefer a very light, neutral potting soil, such as one that is composed of solely Coco Coir, and minor parts of Perlite, and Vermiculite.
As soon as your green ladies enter vegetation, they can benefit from a potting mix that features 30%-40% peat moss, 20%-30% Coco Coir, 20% Perlite, and 20% Vermiculite. The same goes for flowering marijuana plants grown indoors.
What will make the difference in the soil you use for vegetation vs. flowering is the nutrients that you will feed to your green beauties?If you’re planning to use heavy, liquid, non-organic fertilizers, though, it can be a great idea to add some extra 10% – 30% of Perlite to increase aeration and help your plants utilize the nutrients in the best possible way. We have compiled a comprehensive guide on the best nutrients for marijuana plants where you can find everything you need to know on that note.
If you come across some of the following elements in the potting soil you are opting for, then you are on the right track (but do keep in mind there is a very high chance that you won’t find all of the beneficial cannabis soil ingredients listed below present in a single potting mix).
1. Fish emulsion
2. Oyster shell
3. Worm castings
4. Kelp
5. Alfaalfa meal
6. Forest humus
7. Bat Guano
8. Shrimp Meal
9. Crab meal
10. Blood meal
11. Dolomite Lime
12. Epsom Salt
13. Bio-char
We want to pay some extra attention to bio-char as it is one of the little-known yet superb cannabis soil amendments you can opt for. According to the Permaculture Research Institute, bio-coal has been used by the ancient Amazon civilizations for improving soil fertility thousands of years ago. It can be directly spread on top of the soil and covered with another thin layer of soil as to be slowly released through irrigation later on.
Bio-char improves your cannabis plants’ ability to absorb nutrients as it helps for the nutrients to be released efficiently from the soil. Bio-char is also highly beneficial for the establishment of colonies of living microorganisms (the ones that turn ordinary soil into a living, super soil) as it is highly porous. But do keep in mind that only “loaded” or “charged” bio-char that optimizes the benefits of activated charcoal will help your cannabis plants flourish.
“Direct use of bio-char in its raw form may inhibit plant growth,” explains Benjamin Klimpner who has been involved in the bio-char industry for years. “Unlike a loaded bio-char, full of nitrogen and microbial life, which begins to give back to the soil and grow with the moment of its application, crude crude bio-car will absorb nutrients from the soil and plant and impair its development.”
A good-quality of charged bio-char can cost between $12 and $40.
Best Soil for Growing Weed Outdoors
There are three major types of soil that you may be dealing with then growing cannabis outdoors.
1. Sandy soil
2. Clay soil
3. Loamy Soil
All of these different types of natural soil can cater to the needs of your cannabis plants, however, some will work much better than others. On the bright side, you can easily adjust the soil regardless of its type and make it much more better-suited for outdoor cannabis growing.
Most noteworthy, it is rarely the case that you will be dealing with just a single of these soil types. Usually, soil found outdoors is a combination of these three major types, for instance, sandy/loamy, clay/sandy, etc.
We have already compiled an explicit tutorial on how to pick the best soil for marijuana plants where we have highlighted the simple “clump test” method for evaluating the type of soil you are dealing with as an outdoor grower.
Our best advice, though, is that you simply ask the professionals at your garden store for help if you encounter difficulties to determine the type of soil in your outdoor cannabis-garden-to-be. Then again, if you don’t want to mention anything cannabis growing-related, ask for guidelines about adjusting the soil in order to make it suitable for cultivating tomatoes.
For example, if you are faced with highly sandy soil, you will need to add peat moss and/or Vermiculite to increase water-retention rates. On the contrary, if you’re faced with high clay soil, you may need to add Coco Coir and/or Perlite to improve drainage. Next, you will keep adding the preferred type of essential nutrients through fertilization depending on the stage of your plants’ growth.
For outdoor growers who may not be able to keep close monitoring of their outdoor cannabis garden and are concerned about possible droughts, take advantage of water-absorbent polymers.
You’ll need to pre-soak the water-absorbent polymers in nutrient solution at the very start as this will ensure the best results. However, you can feel free to skip on that step. More importantly, you want to dig holes of approximately 60 cm depth and a diameter of about 30 cm so that you can add 1-3 cups of water-absorbent polymers and create a form of a “water reservoir” for your cannabis plants. The holes must be covered in the soil so that your marijuana plants will only reach that unique “water reservoir” later on during their development once they establish a healthy root system.
If you want to stick to 100% organic cannabis growing outdoors, and you don’t want to feed your plants too many additional nutrients, you can further amend the soil to achieve a proper and reliable release of the micro- and macro-nutrients.
For best results, you want to start by digging 3 by 3-foot width to depth holes in your garden. Next, fill them by following our secret recipe for super organic soil for cannabis plants that we listed earlier in this article. This will greatly increase the nutrient rates in your outdoor soil and help your cannabeauties reach out their fullest potential.
But growing cannabis outdoors isn’t limited to planting your green ladies directly into the ground.
Much like with balcony cannabis growing operations, you can opt for suitable pots and simply move these around easily whenever needed. Doing so can also help you control the growing environment better as to avoid any possible issues related to harsh meteorological conditions. In such case, following our tutorial for creating organic cannabis soil can prove to be of your best assistance, and the fact that you can utilize the natural soil available in your backyard garden is simply a big bonus for you as a grower.
Best Soil for Growing Autoflowering Cannabis Strains
Growing autoflowering marijuana plants has both pros and cons. Also, cannabis autoflower varieties do have their unique specifics when it comes to successful cultivation. Indeed, the soil is no exception.
If you are planning on an autoflowering cannabis growing operation, we encourage you to check out our detailed guide on growing marijuana autoflower plants. As far as the best soil for autos is concerned, things are pretty straightforward.
Autoflowering cannabis varieties prefer an airy, light soil that isn’t heavy in structure and isn’t heavy because of high levels of extra nutrients. With this in mind, mixing the best soil for autoflowering cannabis strains is effortless, inexpensive, and won’t take much of your spare time.
You’ll need 1 part of pre-wet Vermiculite, 2 parts of pre-wet Perlite, and 3 parts of Peat moss. If you choose to use compost, you need to add 3 parts of compost to the mix. However, you can also opt for 3 parts of Coco Coir instead, and use only organic home-made fertilizers such as compost tea in order to avoid adding compost directly in the soil mixture itself. Fairly simple and enjoyable, don’t you agree?
Best Soil for Growing Weed: Final Thoughts
“Beans?” asked Jack, looking a little confused.
“Three magical bean seeds to be exact, young man. One, two, three! So magical are they, that if you plant them over-night, by morning they grow right up to the sky,” promised the funny little man.
We wanted to bring to your attention the evergreen tale of Jack and the Beanstalk as we feel it can be associated with cannabis growing in a very wise way. Nope, unfortunately, we don’t have the same magical marijuana seeds as the funny little man and his magical bean seeds.
But we are sure happy to share with you all the know-how regarding the best soil for growing weed that we have accumulated through years of practice.
While there are no shortcuts and magical solutions when it comes to growing cannabis in the soil, picking the best out of the best soil possible is one of the most important decisions you will make. So skip the rush, do your research, keep any negative thoughts out of your head and enjoy the ride! Because this is your cannabis growing adventure, and we promise it’s going to be a beautiful ride.
One last tip that we saved for departure is to keep a growing journal. To learn and utilize the secrets of the best soil for growing weed, it will take some practice. But then again, it will be worth it at the end when you will be proudly placing your flavorsome buds in the jars (yummy!) We wish you a wonderful and fulfilling cannaventure.