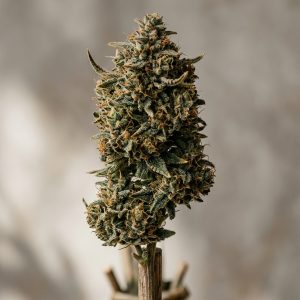
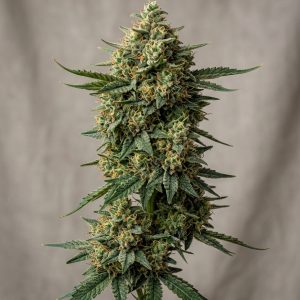
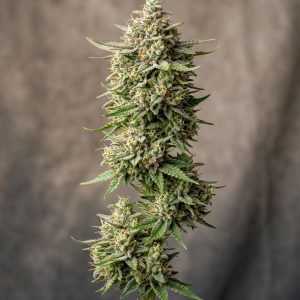

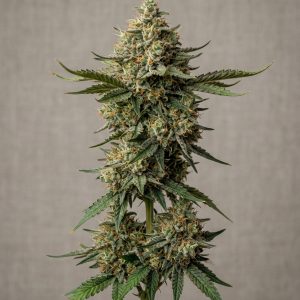
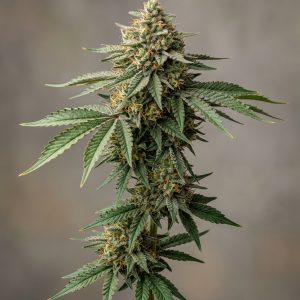
Colors in plants are usually reserved for its flowers. However, cannabis plants seem to break the rules. Not only are cannabis flowers available in varying colors but even the leaves tend to change dramatically from green to purple or from green to red. What causes this change and what to do with it will all be discussed in this article.
Why do cannabis plants change color?
Some cannabis plant strains naturally change their color from the usual green to varying shades. Some, on the other hand, tend to change their color due to exposure to extreme temperatures and other environmental factors. Color changes may also be a sign of a nutrient deficiency or toxicity in plants. It’s important that you correctly diagnose any nutrient problem ASAP to save your plants.
Do all cannabis strains change color?
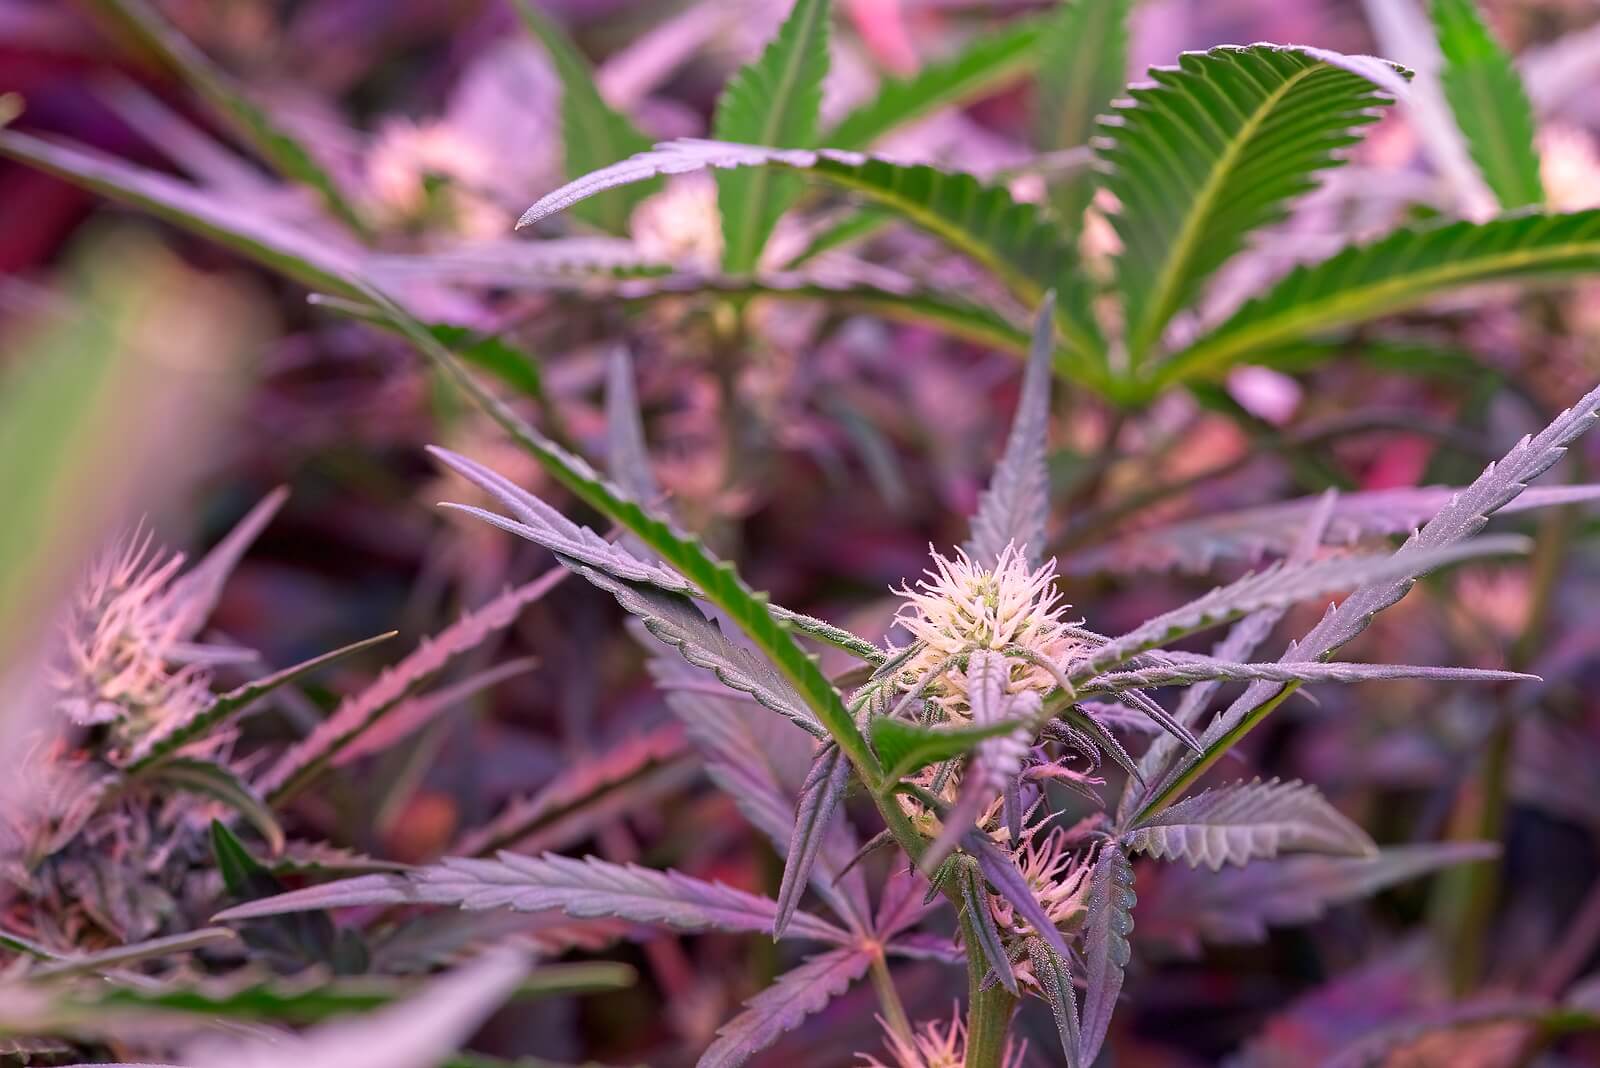
Genetics play a huge role in color changes in plants. For cannabis plants to express their vibrant non-green colors, these need to have the genes to do so. The component in the genetic code that exhibits color changes is called anthocyanins. This is flavonoids that create the colors red, purple and blue.
You will also find anthocyanins in other plants such as violets, blueberries, concord grapes, eggplants and other plants that have a dense purple color. Some cannabis strains contain higher amounts of anthocyanins compared to other cannabis strains. This is the reason why some cannabis plants will constantly show their prominent purple hue again and again.
A classic example is the lovely Granddaddy Purple strain. No matter what type of strain you pair this purple strain with, the result will always retain is purple hue. This means that the plant’s predisposition to increased anthocyanin levels and is actually a quality that most breeders want.
Breeders use these impressive colors to sway growers and customers to get the latest purple-colored strain varieties in the market. And because of the possibility of creating more beautiful strains, growers and breeders have experimented on newer and more colorful strains like Purple Kush, Purple Haze, Purple Urkle, Mendocino Purps and so many more.
From green to shades of purple, red and blue
The most stunning changes in color happen when green cannabis turns into fantastic shades of purple, red and blue. Again this is due to these strains’ genes that contain high anthocyanin. You can immediately tell that the strain has high levels of anthocyanin when their names start with a particular color like pink, blue, red or purple.
But this does not mean that these strains will show these impressive colors right away. These will only show when the conditions are met.
Meanwhile, plants that have lower levels of anthocyanins may also exhibit different color combinations but this may only happen during the final stage of the plant’s life. The chemicals that are responsible for this late change in color are carotenoids. You can tell that there is an increase in the number of carotenoids in a plant when it suddenly develops stunning colors like yellow, gold and orange.
It is also important to note that when cannabis plants are nearing harvest, these tend to change color because chlorophyll starts to cease production. Chlorophyll is the pigment that gives plants their green color. Chlorophyll is during photosynthesis as plants use sunlight to make their food.
As cannabis plants become more mature, these start to produce less chlorophyll. When plants produce less chlorophyll, the different colors start to show and hence plants change from their usual green color to different shades of blue, red and purple. And although the reduction of chlorophyll is a natural thing for all plants, there are also environmental reasons why plants cease chlorophyll production.
Color changes don’t happen to all cannabis strains
Not all cannabis strain has the ability to change color. Those that have it in their genes will be able to change color once these are exposed to the right environmental condition. Why does cannabis change color? Experts believe that these plants naturally produce flavonoids and anthocyanins to protect themselves.
Why flavonoids are important in cannabis
Experts believe that color changes due to the accumulation of flavonoids can enhance the plant’s resistance to pathogens. Plants are more resistant to common diseases that plaque most strains during the growth and flowering stages. This is very important especially during the flowering stages; plants need the natural protecting properties of flavonoids to preserve the health of its buds.
Cannabis plants will also benefit from flavonoid accumulation because it provides protection from ultraviolet rays. Although plants need the sun in manufacturing their food, the ultraviolet rays from the sun can do a lot of damage to plants. UV rays can cause damage to plant DNA, proteins, membranes, and lipids. Usually, plants are unable to avoid UV radiation because they are exposed to sunlight. Flavonoids can stimulate color changes which can protect cannabis plants.
Flavonoid accumulation in cannabis can also enhance the development of seed coats and pollen. Therefore, cannabis plants that tend to change color may be more potent and more viable compared to plants that maintain their green color throughout their lifespans.
Why anthocyanin is important in cannabis plants
Now the role of anthocyanin other than changing plant colors from green to red, blue and purple is still unknown. What is known about this compound is based on the actual experience of growers and breeders.
For instance, expert breeders know that temperature affects the colors of cannabis plants. When the temperature drops, some cannabis plants may exhibit red, blue or purple colors. This is because chlorophyll production halts during fall or autumn as the days start to become shorter.
Also, there are studies that show that higher temperatures can destroy anthocyanin in some fruits and flowers. Similar studies also found out that soils with high pH could reduce anthocyanin production. This could mean that plants that display more colorful appearances thrive in slightly acidic soils.
It has been known that pH levels may also decide what pigment that the plant exhibits. Plants that thrive in acidic environments will change color from green to red or pink when the environment is right. Plants that live in neutral soil pH will carry on a purple color once the environment is right.
Meanwhile, plants that thrive in higher soil pH tend to display hues of blues. While plants that live and thrive in alkaline conditions tend to develop a sunny yellow color.
Will colorful cannabis have more potent effects?
Now probably the most important question of all: are purple, red and blue cannabis more potent than green cannabis? The colors are certainly very appealing and may just be too eye-catching but it does not prove potency. There are even strains that develop stunning purple colors but have very low THC levels.
How to change green cannabis colors
Potent or not, is there some way to enhance the purple, red, blue or yellow pigments in cannabis? For years, cannabis growers have mastered changing green to different, vibrant colors. But keep in mind before you do this that you need to use the cannabis strain that has the ability to change color. Don’t try changing the color of cannabis that is innately green.
Changing green to red or pink hues
The best strains that can change from green to red or pink include Pink Lady Kush, Pink Lemonade, Pink Flower Shaman and Alaskan ThunderBolt. These strains are not too common and may not be available from your local shop or even from online cannabis seeds sites.
Reddish hues are expressed from phenotypes that code for this color to come out during the flowering stage. It is during this stage temperatures should be cooled down and lighting is reduced. Sadly, there is no way to transform green cannabis plants to pink or red because this trait is embedded in their genes.
However, breeders have found out that by reducing the amount of phosphorous in the feeding; you will be able to create slight shades of red and pink.
How to add phosphorous to your cannabis plants
Ordinary fertilizers are available in mixes with major nutrients such as Nitrogen, Phosphorous, and Potassium hence the NPK ratio. The amount of phosphorous, as well as nitrogen and potassium, are indicated on the package.
The key to finding mixes with high phosphorous content, check the labels. It should indicate that it is rich in potassium to make sure. You may also add potassium supplements but make sure that you read closely how to use these supplements.
Most supplements and fertilizer mixes are diluted in water and then watered in the soil. Aside from watching out for the changes in color, take note of all the other changes in the plant body as you apply phosphorous to plants.
From green to black shades
Some examples of strains that can change from green to black shades are Vietnamese landraces like Vietnamese Black, Black Willy, Black Indica, Black Tuna, Black Widow and Black Diesel.
To achieve this unique black color you must subject your plants to cold. Experts say that the colder the temperature is, the darker your plants will be. And of course, the plants you will use should have the genes that will allow them to change into a black color.
If you still want to proceed with using strains that don’t have this kind of gene, your plants will unlikely develop a black shade during the flowering stage. And if you place your plants in warmer temperatures than recommended, it is likely that your plants will develop reddish-orange colors or even colors of vibrant gold.
Reducing temperature during the flowering stage
- Ready a grow room that has an air conditioning unit. Make sure that your AC can be programmed or set to the ideal low temperature.
- Set your grow lights. The plants you are going to transfer will be at their flowering stages so you need to recreate the lighting schedule you used to grow your flowering plants. Place your lights above your plants about two inches from the topmost cola. Use LED lamps as much as possible. Attach a timer to your lights/lamps so you can shut these off automatically.
- Place your plants under your grow lights. Switch on your AC during the evenings only but maintain your air circulation throughout the day. Set your AC between 20 to 26 degrees Centigrade to stimulate the dark color in plants without affecting its development.
- Continue feeding your plants and providing the ideal temperature and lighting until it’s harvest time.
From green to yellow and bright orange
Just a few cannabis strains that have the amazing ability to change from green to yellow or bright orange: Alien OG, Grapefruit, Kandy Skunk, Wicked OG, and Lemon Kush.
Yellow or bright orange color in weed is due to the natural carotenoids in the strain. Carotenoid secretion can be enhanced by increasing the alkalinity in soil towards the end of the flowering phase. Green colors will dissipate and soon, the bright yellow and orange colors will take its place. The new colors are not usually seen on the leaves of the plants but more on the hairs that grow from the buds.
So how do you enhance the alkalinity of your growing environment? The key is to focus on your soil’s quality. You can create nutrient-rich dirt by adding materials in soil using organic matter. Use a homemade compost tea which is a mixture of fish guts and manure. And to make sure that your compost tea has the right pH, test it using a test strip. When you mixture tests correctly, you may now add it to the soil. Use this technique during the end of the flowering phase to improve soil pH but never during the growing phase because this could affect the development of your plants.
How to make compost teas
Here are some of the ingredients that you need to make compost tea at home:
- 3 gallons of tap water
- Pump aerator
- Water pump
- Water pump hose
- Loose compost
- An ounce of unsulfured molasses
- A small amount of vegetable oil
- Spatula or stick
- A sheet of burlap
- Two 5-gallon plastic bucket
- Watering can
- Spray bottle
Instructions
1.Dechlorinate tap water by letting it sit for a while outdoors. This will let chlorine break down. But if you are using well water then you don’t have to do this. Why do you need to remove chlorine? This element kills beneficial microbes in the tea, therefore, you don’t want chlorine in your compost tea.
2. Use a pump to brew your tea. Place a pump aerator in the bottom of a 5-gallon bucket and connect this to an external, air pump. Make sure that you are using a pump with a 5-gallon capacity. You need an efficient pump to aerate the tea as it brews. Attach a hose that is long enough to take air from the pump to the bottom of the bucket.
3. Place loose compost inside the bucket, fill it halfway. Do not pack the compost down because it can affect the way the aerator works
4. Place loose compost inside the bucket, fill it halfway. Do not pack the compost down because it can affect the way the aerator works
5. Add molasses. This sweet stuff will be food for your bacteria so that they will be able to multiply and benefit your plants. Mix in an ounce of molasses and stir well. Water, molasses and compost should mix well to create the perfect compost tea.
6. Plug the pump and power it on. It will add oxygen to the mixture which is also essential to good bacteria growth. The air pump should be strong enough to blow air through the thick and gooey mixture. Continue aerating your compost tea for 2 to 3 days.
7. Use a large stick or spatula to stir the tea on a daily basis. Stirring will ensure that there is no compost that is sticking together at the bottom of the bucket. The ideal compost mix is every part should be moving.
8. After three days, turn off the pump and strain the mixture. After the tea has finished brewing, power off the pump and remove the aerator and hose from the bucket. Line another 5-gallon bucket with burlap or large cheesecloth if you don’t have this.
Strain the compost tea by pouring it through the sac or cloth. When you are done pouring, take the edges of the sac or cloth and wrap the solid material and pull this out of the liquid. Squeeze the bag very gently to remove any excess liquid.
9. Use the tea within 36 hours. The sooner you use this tea, the better. Place the tea inside a watering bucket and apply this on the soil. You may also use a spray bottle to apply this as a foliar spray. Spray the tea on the leaves and stems twice a day.
If you intend to spray the compost tea, add a small amount of vegetable oil inside the spray bottle. Shake this well and spray. The oil will help the compost tea stick to the plants.
How to deal with cannabis color changes?
Sometimes purple color changes may not be triggered by temperatures but may be due to some nutrient deficiency. Experts recommend checking for phosphorous or kalium deficiency especially when the leaves do not just change into purple but also other colors as well.
Check the leaves of your cannabis plants. The purple in the leaves occurs because the roots are unable to take phosphorous or other vital nutrients from the soil. This usually happens when you grow plants indoors.
But if your outdoor cannabis plants turn purple then the main reason would be cold temperatures or quick changes in temperature. If you suspect this, move your plants indoors or at least in a covered area in your garden so that the roots won’t get too cold.
But if your plants were planted from the ground, you may use material to cover your plants, especially around the ground. You may also place a cover to protect your plants from extreme cold. To completely prevent this, avoid planting your cannabis too late in the year.
Understand the life cycle of your plants including their flowering time, preferred growing area (indoors or outdoors) and temperature requirements. These pieces of information will help determine when is the best time to start growing your plants.
Beware of other color changes
Some cannabis discolorations happen because of nutrient imbalances. The most common is cannabis leaves changing from green to yellow. You will notice yellowing of the leaves anytime during the flowering phase especially when it’s nearing harvest time. Is this discoloration normal or is there something wrong with your plants?
Yellowing and other colors may be due to the following reasons
Too high or too low pH
Root and soil pH should be checked regularly to avoid nutrient problems. When plant roots have a high or low pH it affects its ability to absorb many nutrients leading to a variety of nutrient toxicities and deficiencies.
Yellowing is common in cannabis grown in soil, coco coir or hydroponics. You can easily tell that your plants have high or low pH when you spot yellow or other odd colors along the leaves. You should also suspect pH problems when you see spots, patches, and stripes, burning along the edges of the leaves.
Growers must maintain the pH on the roots and in the soil to prevent nutrient deficiencies and discoloration. This should be practiced even if you started with good soil and you use pure water. The optimum soil pH is 6 to 7 while coco coir or hydro can range from 5.5 to 6.5 pH.
To fix pH problems, take the pH of the water before you apply it to your plants. For low or high pH results, adjust these accordingly. You may add acid or basic solution to water beforehand. A fast way to test your soil PH is with a PH pen.
Poor watering
Too much water or giving less water than what your plants need can also lead to discoloration in the leaves. It’s a fact that plants need water to grow. Water also helps deliver nutrients to the different plant parts. Without water or too little water would affect the way nutrients are absorbed by plants from the roots.
On the other hand, too much water can also be dangerous to cannabis plants. If you give your plants too much water that it can handle, it will only settle on the soil and this can dilute nutrients. It can also cause root rot and the development of mold or a root fungus that can be fatal to your plants.
Aside from discoloration on the leaves, you can tell that your plants are suffering from poor watering when you spot droopiness, leaves and stems look fat and swollen, “papery” leaves and a pool of water found at the bottom of the plants.
Prevention is the key this time. You need to start with good soil or coco coir. This should be soil that can absorb more water and can also drain excess water. Choose sandy-clayey soil. Water only when the soil is dry and high and not when the soil is wet and moist.
If your drooping plants perk up right after watering then you are under watering but if these start to droop right after watering then you are overdoing it.
Light burn
Light burn is exactly what the name suggests. Yellowing or discoloration happens on the parts of the plants that are closest to the light. Yellowing, in this case, is different from wilting leaves because these leaves are not dead or dried.
Most of the time, light burn can take a few days to develop and usually once the plant is past the growing stage, plants won’t be able to make new leaves to replace the ones that have changed color. In Light burn, only the leaves that are closest to the light suffer from discoloration and not the entire plant.
Even if your indoor environment has an optimum temperature, your plant can still suffer from light burn when these are too close to the light. Plants usually get light burn when exposed to extreme lights like HPS, LEC or LED.
There are also plants that are more sensitive to light burn compared to others. This is evident when you have two or more plants or two or more strains under one type of indoor light. Symptoms of light burn can vary from plant to plant but usually, the burn appears on the parts of your plants that are closest to the light.
To fix light burn, move your plants away from the light source. You may also bend the affected parts so that light can penetrate through the plants and illuminate other plant parts. Check instructions on how to use your chosen grow light. If your grow light is intended for growing plants, find out any manufacturer’s recommendations about how far away you should keep your lights from the tip of your plants.
Heat stress or cold shock
Cannabis plants that have the ability to turn purple can change color once these are subjected to cold environments just before harvest time. However, some plants may not do well with too hot or too cold environments or simply moving from an environment that is too cold or too hot.
Temperature problems can be diagnosed when you spot yellowing or burning of the leaves near the light source, yellowing of the upper leaves or leaves form tacos or leaves turning up.
To fix heat stress or cold shock, find out the indoor room temperature. A temperature below 50 degrees Celsius can cause discoloration of the leaves. Freezing temperatures can kill some cannabis strains. Transferring from a warm environment to a concrete basement may also instantly kill some strains just overnight.
Again, prevention is the key to fixing room temperature problems. Make sure that their indoor growing environment is not too hot or not too cold. If the environment is too hot even for you, move the plants away from the light.
As much as possible, maintain indoor temperature at 60 degrees Fahrenheit at night and above 85 degrees Fahrenheit during the day. The room should have adequate air circulation to avoid any hot spots. Keep the roots of your plants warm so keep the containers elevated from a cold concrete floor.
Pests
Some bugs and pests can be too tough on cannabis plants causing discoloration. Pests such as spider mites, aphids and gnats can eat the delicious, fat back side of the leaves of the plants and cause stress to your plants.
You can tell that your plants have problems with pests when you see bugs or the eggs of bugs usually at the bottom side of the plants. You should also see yellowing of the leaves plus your plants don’t seem to look healthy or “happy.”
To remove pests, you must first identify where your plants got the pest or bug. Pests are common if you grow your plants outdoors. If you are growing plants indoors and you are 100% sure that your plants are essentially pest-free, then there is a good chance that these are from other plants that you may have purchased or brought in.
Therefore, never get clones or plants from other nurseries. Be very vigilant and inspect every plant for pests. To remove pests, use natural pesticides. The most common natural oil is neem, from the neem plant.
Neem is diluted with water and placed in a spray bottle. The mixture is sprayed over the plants (especially the backside of the leaves) and then allowed to remain on the plants to kill insects. Do not spray directly on the buds because it causes a strong scent and flavor changes to the buds. Do this every day until all the bugs have been removed.